How to create a Lesson using the Fill in the Blanks Component?
This is a content type where the learner fills in the missing words in a text. The learner is shown a solution after filling in all the missing words. Authors enter text and mark words to be replaced with asterisks.
When to use this Component
Fill in the Blanks component can be used effectively in language learning. Using this component, you can test the learner's ability to understand context, vocabulary or grammatical concepts in order to correctly replace the missing pieces of text.
In addition to native and second language learning, Fill in the Blanks component can be used to test the learner's ability to reproduce facts or mathematical inferences.
How it works
-
User fills in the missing words for each question and clicks the Check button to check the answers.
-
If the user has filled in the blanks with correct answers, it will be highlighted in green with tick mark. If the user has filled in any wrong answer, it will be highlighted in red with a cross mark.
-
Scores are shown at the bottom left side of the page. Change and Show solutions buttons appear at the bottom right side of the page.
-
You can change the wrong answers by pressing the Change button.
-
When the user clicks the Show Solutions button, the correct answers are displayed next to the wrong answer's empty box.
-
You can try answering again by pressing the Retry button.
Features of this Component
-
You can place an optional heading for the page.
-
You can enable the "Retry" button.
-
You can set the contents to be case sensitive.
-
You can enable to automatically check answers just after the user has entered the answer.
-
You can add as many questions and answers as possible.
You can create a page using this component by following the below steps.
Step 1: Go to the required Slide
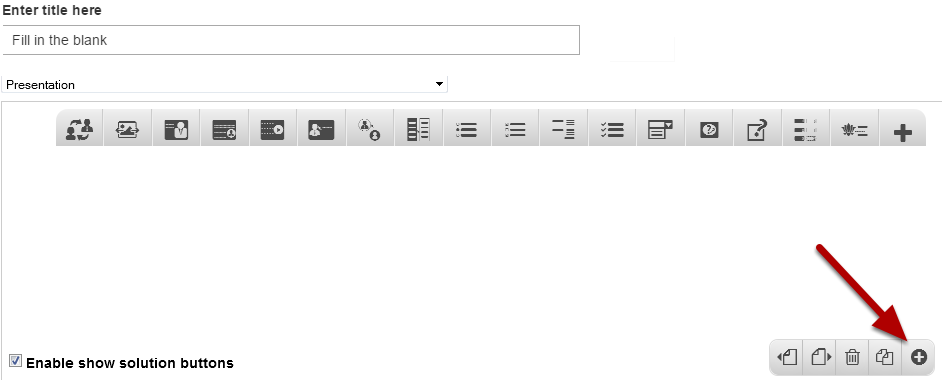
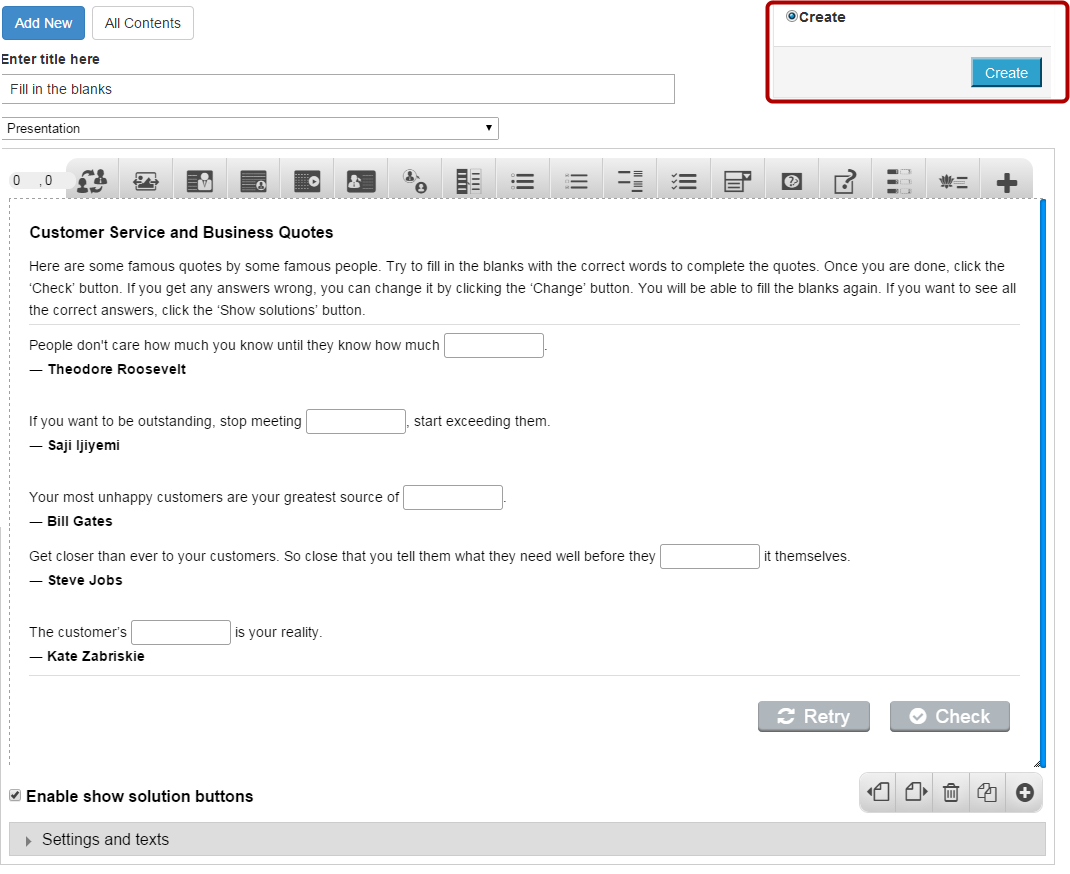
If you are creating a new Presentation, you will be taken to the first slide where you can use this component and create a page. Alternatively, if you want to add a new slide where you want to use this component, click on the '+' icon on the lower right corner as shown in the above image.
Step 2: Click on the Fill in the Blanks Component Icon
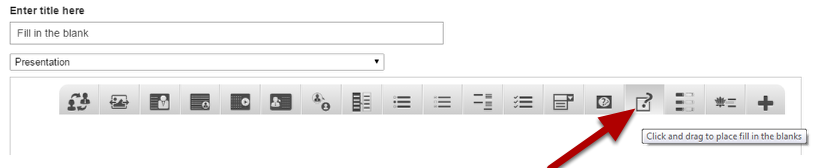
Then click on the Fill in the Blanks component icon as shown in the above image. You will see a screen similar to the image shown below.
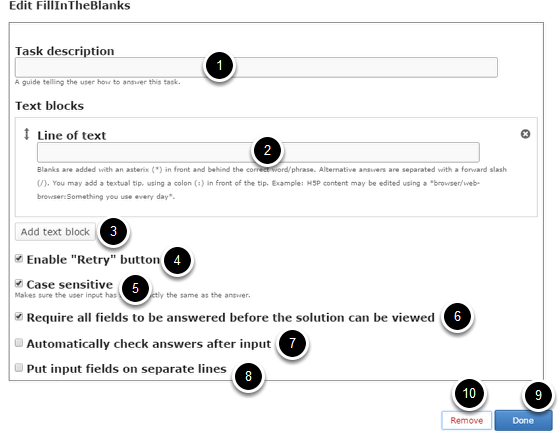
On this screen, you can
-
Add the task description text or contents on the Task Description [1] field. Please note that this field is mandatory.
-
Add a text on the Link of Text field under the Text Block [2] title.
-
Add more text blocks by clicking on the Add Text block [3] button.
-
Enable the Retry option by clicking on the Enable Retry button [4] checkbox.
-
Enable case sensitivity of the text by clicking on the Case sensitive [5] checkbox.
-
Set that all the fields should be answered before viewing the solution by clicking the Require all fields to be answered before the solution can be viewed [6] checkbox.
-
Enable automatically checking the answers after the user gives inputs by clicking the Automatically check answers after input [7] checkbox.
-
Display the input fields on a separate line by clicking Put input fields on separate lines [8] checkbox.
-
Click on the Done [9] button to save the changes.
-
Remove the component from the page by clicking the Remove [10] link.
Step 3: Add Task Description
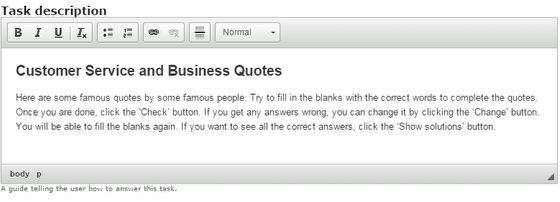
In the Task description field we give the learner basic instructions or introduce the problem to be solved. You can also change the format of the text, add and remove hyperlinks and insert horizontal lines between the contents. This field is mandatory.
Step 4: Enter the Line of Text
Under Text blocks title, we add our sentences and define which words are to be removed for the learner to identify. By default, only a single Text block is displayed when you create a new Fill in the blanks page.
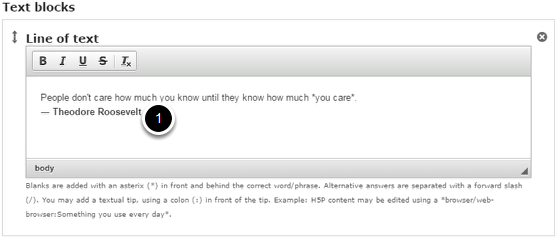
Under Text blocks title, start entering the text in the Line of Text [1] field. You can also change the format of the Text. This field is mandatory. You should now have something like the above image.
Step 5: Set the Blanks and corresponding Answers
Under Line of text, Blanks are added with an asterisk (*) in front and behind the correct word or phrase. Alternative answers are separated with a forward slash (/). You may add a textual tip, using a colon (:) in front of the tip.
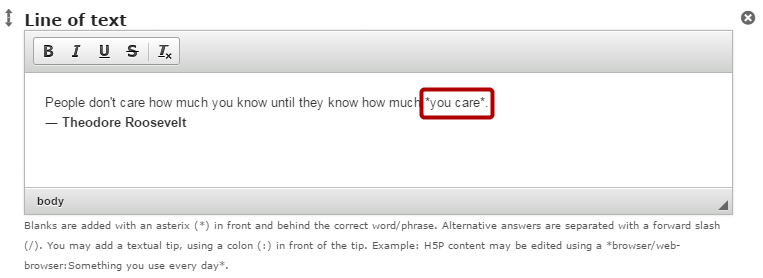
Authors enter text and mark answer words to be replaced with asterisks. In our example, we place asterisks before and after the words “you care”. So, the user will see the text replaced with a text box, in which the user will enter the answer.
Similarly, you can give alternative answers using a forward slash (/) and hints using a colon (:) character just like the below example.
London is the capital of *UK/U.K./United Kingdom/England:A European Country*.
For the above question, the user can enter UK, U.K., United Kingdom or England. The hint will be “A European Country”.
If you want to add another one, click the Add Text Block [3] button below the Text Block as shown in the below image..
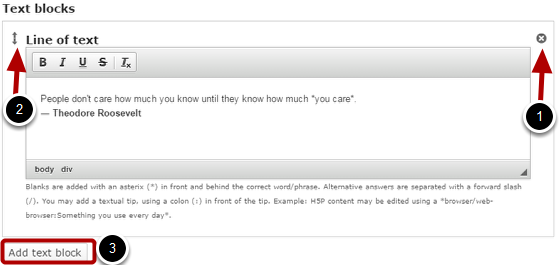
Another Text Block will be added after you click the Add text block button. You can remove any Text blocks by clicking the X [1] button on the top right corner of the Option window. You can also change the order of the Text blocks by dragging the Double Headed Arrow [2] button on the top left corner of the Option window. Similarly, you can add as many Text Blocks as you want.
Step 6: Enable Retry Button (Optional)
If you click Enable “Retry” button checkbox, you can give one more chance to user after seeing the answers using Show Solutions option. This option is optional, and so tick the checkbox if you need so. By default this checkbox will be unchecked.
Step 7: Check Case Sensitive Checkbox (Optional)
This option is used to make sure the user input has to be exactly the same as the answer. This option is optional, and so tick the checkbox if you need so. By default this checkbox will be unchecked.
Step 8: Check All Fields to be answered Checkbox (Optional)
This option is used to check all the fields to be answered before the solution can be viewed. If you check this option, the user will be able to see the answers only after he/she has entered an answer for each blank. This option is optional, and so you can tick this checkbox if you need so. By default this checkbox will be unchecked as well.
Step 9: Check Automatically check the Answers Checkbox (Optional)
This option is used to automatically check answers after the user has entered the answers for each question. If this checkbox is checked, the answer will be evaluated immediately after the user has entered the answer and moves away from the field. This option is optional, and so tick this checkbox if you need so.
Step 10: Check Put Input Fields on separate Lines Checkbox (Optional)
This option is used to put the input fields on separate lines. A typical example is given below.
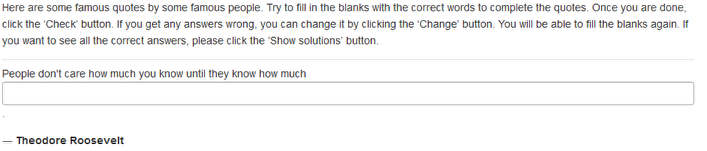
In the above image, you can see the blank field appearing on in a separate line below the text. This option is also optional, and so ticks the checkbox if you need so.
Step 11: Click the Done Button

Once you've updated all the details, click the Done [1] button shown above to complete editing the page. You can cancel creating the page just by clicking the Remove [2] link shown above. If you click the Done button, you will see the below screen with a preview of the created page.
Step 12: Click the Create Button
If you still want to edit the page, just double click on the preview page, and you will be taken to the Edit page. If you've done all the changes, you can click the Create button as shown above picture to finish editing the page.
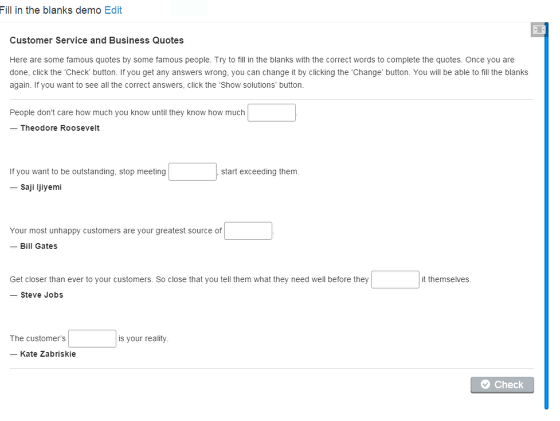
You can see the finished page created with Fill in the blanks Component as shown in the above image.
Notes
-
You can create as many questions as possible in a page using this component.
-
Similarly, you can add any number of blanks to a page.